June 1, 2017

Welcome to my yurt passion!

Based on Big Island, Hawaii, this blog entails all aspects of yurt living; especially for nature lovers and off-grid enthusiasts.

Consider renting, visit the bookstore, and browse links on the right sidebar. Yurt living and building consultation available.

VACATION HOST ~ ECO SHOPS ~ LOCAL CATERING, GARDENING ~ HAWAII YURT LIVING CONSULTATION

See Pinterest Board for pics and images.

March 4, 2016

Yurt Living - Groundwork + Foundation on Big Island, Hawaii

Becky Kemery, author of Living in the Round, provides a world of information and inspiration dedicated to helping people make yurt decisions. A good start is to read the history of yurts she published years ago. The more yurt homework you do, the better, but don’t forget the importance of the setting  ― whether constructed on land or a trailer.

Yurts are comfortable in so many environments and that’s a good thing for Hawaii dwellers. Heck, there are about ten general climate zones on Big Island alone. From shore to high altitudes, yurts make sustainable sense here. Hence, the popularity continues to grow in paradise.
.
The purpose of constructing a yurt may be for a home, office, store, workshop, rental, camp, or vacation lodge. The yurt design may include a loft, be surrounded by a large deck, or be a two-story structure. It can be permitted to satisfy building codes, or be off-grid and hidden.

Preparing the groundwork for a yurt is much like that of a conventional building. Yet yurt kits (custom or pre-fab), are sold without consideration of your building site. You may be honored a discussion with a helpful yurt salesman, but the responsibility is ultimately yours. Thankfully, yurt builders are kind to share instructional videos. These are helpful to determine your preparation budget, so check out the videos listed below.

After you determine your purpose and site, follow these steps to refine the process:

GROUNDWORK - Any trees? You may love the idea of your yurt in the middle of a forest, but there are many reason why you want some distance. Plan to clear enough to walk around your structure. You don’t want limbs falling, so I recommend at least topping the tall trees in close proximity. There are many ways to maintain privacy from nature with creative landscaping. Don’t forget your rain water catchment and gutter system need clearance too.

ARCHITECTURAL DRAWINGS OR PERSONAL RENDERING - Drawings with the architectural stamp are required from Hawaii Public Works for any buildings to be inspected and permitted. This is done by a professional draftsman and typically includes your foundation, plumbing and power. If off-the-grid is your goal, don’t hesitate to ask for a “non-permit” quote. Illustrated plans are imperative for good teamwork and labor ― even if it’s a crude sketch without the draftsman!

FOUNDATION - Post and pier is the preferred choice for Hawaii terrain. That applies to all altitudes and it’s ideal over lava. However, one can get creative ― not to mention luxurious. Remember, your yurt order does not typically include the floor. It is possible to erect it onto a concrete pad. Pour the cement circular, same diameter as the yurt. Attach a flexible bender board around the outside of the platform.

CEMENT OPTIONS - If your location is tropical-chilly or high altitude, you may wish to consider installing radiant tubing within a concrete slab. With paint and stain to artsy-inventive finishes, you can create a beautiful floor with concrete. (Maybe even hempcrete)? Another option is to build a ferrocement water catchment tank as your foundation under the yurt. Yeah, get inventive!

DECK + ENTRY - Back to the drawings ― figure out how to get in and out of your yurt, how many doors, and if rain cover and shade are needed. How easy will it be to open and close your windows? In some areas, you may wish to have your wall open and close instead.

SIP OPTION - That’s structural insulated panels over concrete footings and framing. This has become so popular with yurt kit manufacturers, most of them offer it as an add-on option for floors and decking. It makes the framing process much easier and faster. Shelter Designs Yurts of Montana explains how to use SIP platforms well. For SIP products without glue, see RAY-CORE panels. Find more SIP resources here.


VIDEOS, YouTube:
Platform Construction, by Ron Trout the owner and designer of Light Feet Yurts
How to Make Hempcrete
Mixing Hempcrete in a Drum Mixer
SIP Platform Build Video, for 20-foot Mongolian ger


Delia is a Big Island yurt design consultant by request.

May 23, 2015

Canopy Addition

 Yurt builder Donald Hyatt in the Puna District of Big Island, Hawaii came up with a solution to keep my yurt entry covered and dry.
Although the canopy protected the three-step lanai, I needed help to stop rainwater from dripping over the existing rain cricket and gutters.
This is a picture of the other side.

For my restricted budget, I am very happy with Don's solution. Now my door, frame and lanai shall no longer fear rotting!

RELATED POST:
Yurt Living – Creative Doorway Designs

April 8, 2015

Wooden Hard-wall Yurt in Maine

From fabric yurt in rural Maine to wood construction, ‒ meet Josh, Melanie and kids.

With Bill Coperthwaite influence, this family documents their yurt loving journey beautifully.

Read more on their Circle In blog.

February 23, 2015

Kids in a Yurt

A new playhouse, swing, and climbing wall in a 30-foot yurt; precious!

This is super to have while adults work in another section of yurt. Pictured herein waxing snow skis.

Check out the floor and loft plans, as well as a slide-show tour.

Also, a YouTube video helps planners with kids.

This yurt was constructed 2008 in Eagle River, Alaska on top of a 30-foot square garage. There is a roof over-hang of 2 feet on three sides of the garage to form a deck around the perimeter of the yurt.

Read more from the family blog on http://movingtoak.blogspot.com/

November 13, 2014

Roam for a Dome?

The purpose of this article is to consider how to repair or replace your yurt dome.

As a sales rep for Hawaiian yurts, I get lots of queries for dome replacements. That reminds me of a builder who said that skylights and domes eventually have problems and to not purchase them if you can't deal with repairing leaks.

My 24-foot yurt kit from Colorado was erected 2009 and never seemed to fit properly onto the compression ring. I didn't think it was a problem until it leaked. Several people tried various solutions from weather stripping to styrofoam, but there was always a gap between the dome and ring. Because only the rare south wind caused some rain to land on my floor, I was able to just cope with the misfit.

In this low-altitude tropical setting, I typically opened the dome during the day and closed it at night. As most yurt kits from the mainland, a dome opener is required. Unaware my latch and screw was off track, a fine crack formed in the acrylic dome. Opening and closing daily made the crack worse, but it took me months to realize it.

Well, the crack expanded a lot during 2014 Hurricane Iselle and my little occasional leak turned into a waterfall. From part time carpenters to commercial builders, help was sought. Yet each strategy proposed was stuck short on how not to step on the fabric roof between the rafters, which would cause serious damage.

There were so many complications (scaffolding included) I'll not detail here. I came to the point of wanting to remove the dome and build a cupola to replace it. But I couldn't afford options and was still stuck on how to prevent labor damage to the roof.

Creative woodworker Peter Frost of Puna came up with a solution pictured here that I'm very happy with. He repaired the crack and inserted a wind turbine from Home Depot. Peter jokingly calls it "the nipple" and suggested a glowing hula hoop around the exterior of the dome.

Nathan Toler of Backyard Yurts was super helpful with repair instructions, yet he didn't have the dome mold to fit my 24-foot design at the time. Shipping a new dome from Colorado was not an affordable option I wanted to pursue. Afterall, it may fit as poorly as the original.


I hope my story helps those that need to fix their dome. Fortunately, Nathan does have 4 or 5-foot dome molds to fit on the compression ring. He hand-blows the acrylic in Hawaii and the result is stronger and thicker than what competitors offer.

Each fourth-inch flat acrylic sheet is heated in a large commercial plastics oven until pliable, then placed in his round blowing forming table. Compressed air is pushed into the center of the dome form until the correct height is achieved. Then the dome is set in place to cool and harden. The domes are made perfectly clear, or choose from an array of tints for an extra fee.

Because Nathan design-customizes yurt orders, there is no need for the awkward dome opener. The windows and air flow are tailor-made for your particular climate and location. A fan can be added under the dome, if desired.

So whether you are fixing a dome, or ordering a new yurt, know that there is a competitive offering in Hawaii that cannot be matched from the mainland!

RELATED POST
Yurt Living: Dome, Cupola or Spire?

July 27, 2014

Hawaii Properties, Puna + HOVE Regions

Introducing Jacinth DeLuz III, who sells properties with owner financing -- only $500 down and no credit check!

Most of the properties are vacant lands, located in Puna and HOVE regions.

While you check out the site, be sure to view the Puna sheds available.

May your dreams come true for small living in paradise.

July 19, 2014

Tiny Homes: Simple Shelter


by Lloyd Kahn
Here are some 150 builders who have created tiny homes (under 500 sq. ft.). There are some 1,300 photos of homes on land, homes on wheels, homes on the road, homes on water, even homes in the trees. There are also studios, saunas, garden sheds, and greenhouses.
Photo from book.

Find more great reads on the Bookstore page of this blog.

July 13, 2014

Loveable Loo Concept Designs

Self construction of the Loveable Loo design concept was accomplished with the help of "Women Working in Wood" -- located in Keaau, Big Island, Hawaii.

Never touched a table saw or held a nail gun before!

Good idea for yurt builders who want to avoid plumbing, or construct bathroom/s outside of the yurt.

View the Milkwood site for separate bath house design ideas, and more.

July 7, 2014

What's a Chic Eco Toilet?

Love this design, as seen on a recent Tumbleweed Tiny House story where I read this cute space saver can be constructed with a 5-gallon bucket for less than $50.

Wonder how to properly compost poop and pee? The Humanure Handbook is a must for anyone interested in an off-grid simple lifestyle.
Check out the rave reviews. And if you wish, follow me with this toilet mission for my school bus conversion. Below is a summary of my research ...

A great product video by Loveable Loo is on YouTube and illustrates how to do this without plumbing.

So, you can custom-construct the design for your space ... either DIY or look for less expensive help. Either way, creator Joe Jenkins provides a list of captivating videos on his site. This amazing guy consults and has an admirable record of traveling to natural disasters where he teaches others how to deal with human waste as they rebuild their homes.

Funny I didn't realize I would be planning the toilet construction before designing the layout.

Now I'm looking for my sawdust resource as I write!

DIY Workshops by Red Kite Yurts of Scotland


Yurt Making Workshop 9th August 2014


Learn how to assemble and dismantle the finished product... and so much more!!

Check out their video of full-range services published May 15, 2011. I'm so impressed how Red Kite Yurts provides stunning spaces for weddings, events .. and has been doing so for more than ten years.


The course will be held at the Red Kite Yurt workshop at
Cambusbeg Farm
Callander
FK17 8LJ

Cost: £75 per person

Email paul@redkiteyurts.com or phone 01877 330943 to book your spot.

March 13, 2014

Off Grid Dream Pics

Straw Yurt

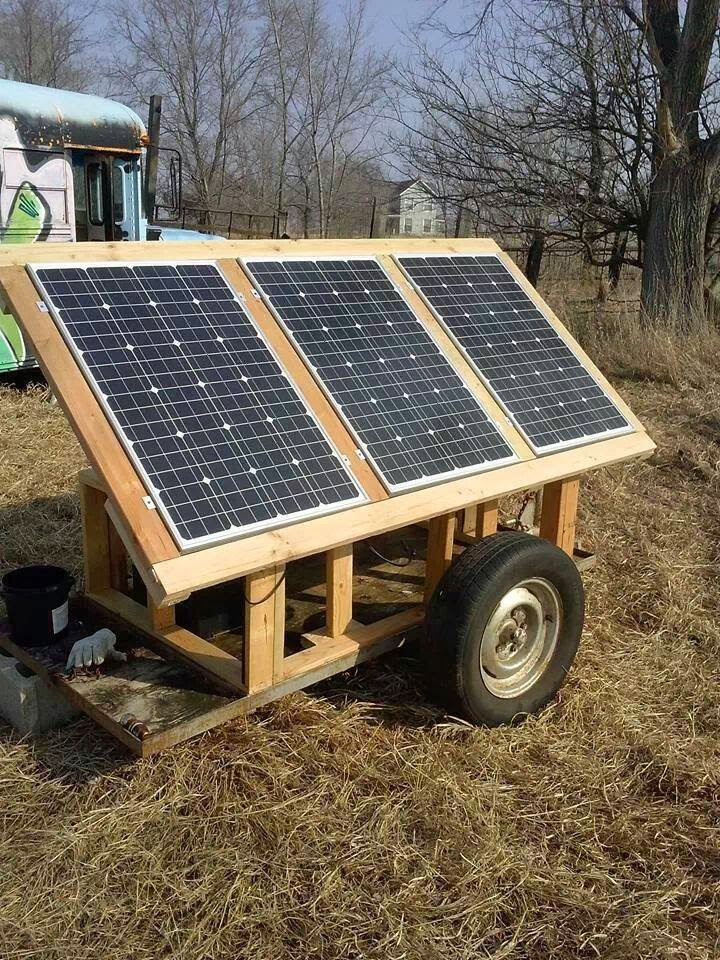
Solar on Wheels

Compliments of www.offgridquest.com

March 12, 2014

Water Catchment Art

From before to after by pane:


Yea, my yurt home water catchment was painted by a work trader from Austria 2014 February; mission accomplished. Love it!

The tank was two-thirds full of rain water.

Algae and plant particles were siphoned from inside the tank with a water hose. The process took about an hour.

There is a water filter on the pump located under my yurt home. Although I do not drink this water, it is used for washing dishes, bathing and toilet.

The nearly five year old catchment cover has some tears, but is in good condition after clean up. It is on top of the new cover.

Why two covers? The old cover ($135 cost) blocks light, which prevents algae accumulation. The new cover ($155 cost) is much more durable, but does not block light so well.

The old cover had a three-year life projection. The new cover has a ten-year projection.

Would love a hard-top catchment, yet the cost is about $2,000!

Artist Renata Jett

December 1, 2013

Artistic Water Catchment


Well constructed and beautiful water catchment at Pahoa Transfer Station, a/k/a "the dump". 

Big MAHALO to artist Charlene Lofgreen!

With gutters on your yurt, gift yourself plumbing to a catchment with curb appeal.


October 5, 2013

On The Road

On the Road Perspective
Oahu-made yurt on custom built trailer.

August 23, 2013

Yurt Papercrete Project

Read about DIY yurt and other papercrete projects on Instructables.com, written by Spike of Santa Fe, New Mexico.

July 20, 2013

Yurts + Feng Shui

Love Feng Shui Sister Feilani!

Feilani was a volunteer of this art and special technique on facebook. She described her consulting as very traditional and "un-intimidating" ― called the "Red Envelope" tradition.

In 2010 she wrote:

If cash is what you're looking for, then look no further! Try this money enhancement... take 9 paper bills, fan them out and place this anywhere in your Wealth Corner (as you walk in through your front door, it's located to the very far left corner of your home or office). That good energy we like to call "chi", will fan over some cash your way in no time!

So I asked Feilani ...

  • Do I still look left if my main entry is the back door?
  • Does my round yurt home make a difference?

Answers:

  • Always use your front door as the "mouth of your chi." Even if you use the backdoor, you can "activate" the front door by simply opening it now and again. And place a bell on the front door handle (indoor or outdoor handle will do). Oh and a wind chime by the front door can do wonders!
  • As for the round yurt, try to anchor the corners of your bagua by placing planters by the "imaginary four corner's" of your yurt. The easiest way to envision this is to draw a square around your circular yurt, (it will look like a circle within a square) and those four corners are where you need anchors.

Mongolian Ger Front Doors
So good to know Feilani; thanks! Another tip I learned is to plant red blooming plants for prosperity near your front door or/and along your walkway.

For bells and chimes, see products below ...

Invitation to my YURTS board on Pinterest: